Adding Disks to ASM Linux UDEV Systems
In this post explain how to manually add disks to the Linux operating system. We will also explain how to set them up so that they can be used to store data from our Oracle database.
First, let's list the disks we have in our virtual machine.
There are two ways, one manually and the other through a graphical form as shown below.
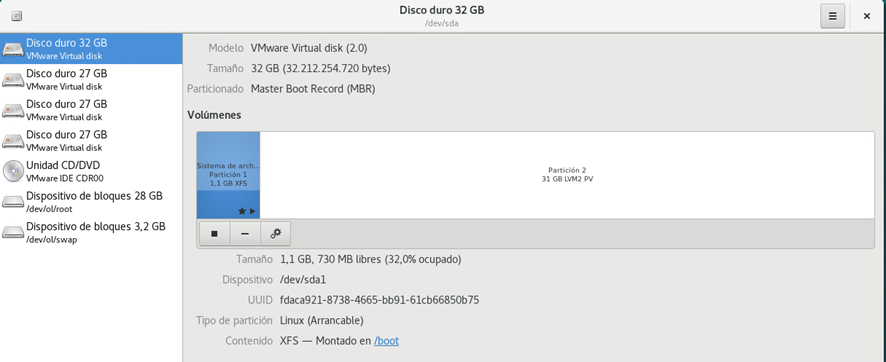
In this document we are not going to perform the actions graphically, as they are quite intuitive. You can rely on the documentation to perform the actions graphically. There are other graphical and widely used alternatives such as gparted, which we will present in later posts. In this case, therefore we will proceed to perform the process manually.
Steps to partition a Linux disk Linux
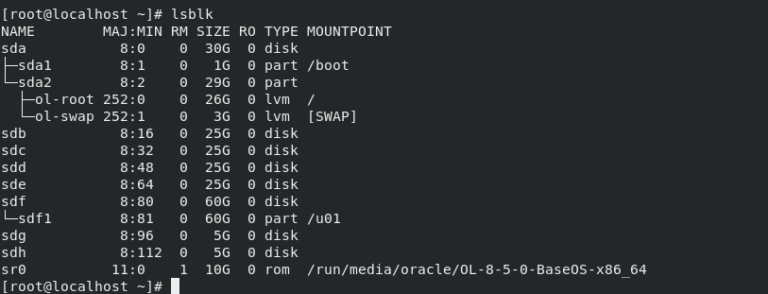
List of discs
We list the disks that we have available with lsblk. In this case we have three 25G disks to partition (sdb,sdc,sdd).
Como crear discos Oracle ASM usando reglas UDEV

We look for the serial, based on the "ID_SERIAL" indicator:
E:ID_SCSI_SERIAL=6000c29e02ce1d3ab248271bc4ea4847
E: ID_SERIAL=36000c29e02ce1d3ab248271bc4ea4847
E:ID_SERIAL_SHORT=6000c29e02ce1d3ab248271bc4ea4847
E: ID_WWN=0x6000c29e02ce1d3a
E:ID_WWN_VENDOR_EXTENSION=0xb248271bc4ea4847
E:ID_WWN_WITH_EXTENSION=0x6000c29e02ce1d3ab248271bc4ea4847
E:SCSI_IDENT_SERIAL=6000c29e02ce1d3ab248271bc4ea4847
We create a new udev rules file.
vi /etc/udev/rules.d/96-asm.rules
El contenido es el siguiente, en nuestro caso el disco en ASM será para datos (DATA) .
[root@oracle-21 ~]# cat /etc/udev/rules.d/96-asm.rules
# Disk /dev/sdg
KERNEL=="sd*", SUBSYSTEM=="block", ENV{ID_SERIAL}=="36000c29e02ce1d3ab248271bc4ea4847", SYMLINK+="oracleasm/DATA2", OWNER="oracle", GROUP="dba", MODE="0660" ,OPTIONS:="nowatch"
Reload the udev/rules rules
udevadm control --reload-rules
udevadm trigger --type=devices --action=change
Verificamos los discos que posteriormente serán candidatos a añadir a los diskgroup de ASM, y comprobamos que nuestro nuevo disco se ha añadido de forma correcta.
[root@localhost ~]# ll /dev/oracleasm
total 0
lrwxrwxrwx. 1 root root root 6 Jun 8 19:04 DATA -> ../sdb
lrwxrwxrwx. 1 root root root 6 Jun 8 19:04 DATA1 -> ../sde
lrwxrwxrwx. 1 root root root 6 Jun 8 19:04 DATA2 -> ../sdg
lrwxrwxrwx. 1 root root root 6 Jun 8 19:04 DATA3 -> ../sdh
lrwxrwxrwx. 1 root root root 6 Jun 8 19:04 FRA -> ../sdc
lrwxrwxrwx. 1 root root root 6 Jun 8 19:04 FRA1 -> ../sdd
Será necesario realizar estos pasos descritos anteriormente con cada uno de los discos que queramos añadir a ASM en nuestra arquitectura Oracle. Una vez realizados estos pasos, los discos ya pueden ser añadidos al espacio ASM, según se indica en la parte correspondiente de la página siguiente del blog: http://bdconraul.com/oracle/anadir-discos-a-asm/